Introduction
Zorin OS is a powerful, user-friendly Linux-based operating system designed specifically to help people transition smoothly from Windows or macOS. Developed with beginners in mind, Zorin OS features an intuitive desktop interface that will feel immediately familiar to anyone who has used mainstream operating systems.
This guide is perfect for schools looking to reduce software licensing costs, individuals wanting to breathe new life into older computers, small businesses seeking secure and stable systems, and privacy-conscious users who want control over their data. Whether you're installing Zorin OS on a modern laptop or a ten-year-old desktop, this step-by-step tutorial will walk you through every stage of the installation process.
Zorin OS comes in several editions: Zorin OS Core (the standard free version with a Windows-like interface), Zorin OS Lite (optimized for older, low-specification computers), and Zorin OS Pro (a premium version with additional desktop layouts and productivity software). All versions are built on Ubuntu Linux, ensuring excellent hardware compatibility and access to thousands of free applications.
By the end of this guide, you'll have a fully functional Zorin OS installation, understand how to customize your system, and know how to troubleshoot common issues. Let's begin your journey into the world of Linux.
System Requirements
Before installing Zorin OS, it's essential to verify that your computer meets the minimum hardware requirements. Zorin OS is remarkably lightweight compared to modern Windows versions, making it ideal for reviving older machines.
Minimum Hardware Requirements
- Processor: 1 GHz Dual Core processor (Intel or AMD)
- RAM: 2 GB (for Zorin OS Core) or 1 GB (for Zorin OS Lite)
- Storage: 10 GB of available hard drive space
- Display: 800 x 600 resolution screen
- Media: USB port or DVD drive for installation media
Recommended Specifications
For a smoother, more responsive experience, especially if you plan to use modern web browsers and office applications:
- Processor: Intel Core i3 or AMD equivalent (or newer)
- RAM: 4 GB or more
- Storage: 20 GB of available space (SSD recommended for best performance)
- Display: 1366 x 768 resolution or higher
- Graphics: Integrated graphics or dedicated GPU
Storage Space Considerations
While Zorin OS requires only 10 GB minimum, allocating at least 20-30 GB allows comfortable space for:
- System updates and upgrades
- Installing additional software applications
- Storing documents, photos, and files
- Creating system snapshots for recovery
Internet Requirements
An internet connection is highly recommended (but not strictly required) for:
- Downloading system updates during installation
- Installing additional drivers and language packs
- Accessing the Software Center for applications
- Enabling multimedia codecs
A stable broadband connection (wired or wireless) will significantly improve your installation experience.
Before You Begin
Proper preparation prevents problems. Before starting the installation process, complete these essential preparatory steps.
Backing Up Important Files
CRITICAL WARNING: Installing an operating system can potentially result in data loss, especially if you're replacing your current system entirely. Always back up your important files before proceeding.
What to back up:
- Documents, spreadsheets, and presentations
- Photos, videos, and music collections
- Browser bookmarks and passwords
- Email archives
- Application settings and license keys
Where to back up:
- External USB hard drive or flash drive
- Cloud storage services (Google Drive, OneDrive, Dropbox)
- Network-attached storage (NAS) devices
- Secondary internal hard drive (if available)
Deciding Between Dual-Boot and Full Installation
You have two main installation options:
Full Installation (Replace Existing OS)
- Removes your current operating system completely
- Gives Zorin OS access to your entire hard drive
- Simplest option with no boot menu complexity
- Best for dedicated Linux machines or older computers
Dual-Boot Installation (Install Alongside Windows/macOS)
- Keeps your existing operating system intact
- Allows you to choose which OS to boot at startup
- Requires adequate free disk space (at least 30 GB recommended)
- Ideal for users who still need occasional access to Windows applications
Understanding BIOS vs UEFI
Modern computers use two types of firmware systems:
BIOS (Basic Input/Output System)
- Older firmware standard (pre-2010 computers)
- Uses MBR (Master Boot Record) partitioning
- Simpler boot process
UEFI (Unified Extensible Firmware Interface)
- Modern firmware standard (2010+ computers)
- Uses GPT (GUID Partition Table) partitioning
- Includes Secure Boot feature
- Faster boot times and additional security features
You don't need to be an expert on these systems, but knowing which your computer uses helps troubleshoot boot issues. Most computers manufactured after 2015 use UEFI.
Checking Secure Boot Settings
Secure Boot is a UEFI security feature that prevents unauthorized software from running during startup. While Zorin OS supports Secure Boot, some users prefer to disable it during installation to avoid potential complications.
To check/disable Secure Boot:
- Restart your computer
- Enter BIOS/UEFI settings (usually by pressing F2, F10, F12, Delete, or Esc during startup)
- Navigate to the Boot or Security section
- Look for "Secure Boot" option
- Note whether it's enabled (you can disable it if experiencing boot issues)
Note: You can re-enable Secure Boot after installation if desired. Zorin OS is compatible with Secure Boot when properly configured.
Downloading Zorin OS
Now that your system is prepared, let's download the Zorin OS installation image.
Choosing Between Core, Lite, and Pro Versions
Visit the official Zorin OS website at zorin.com/os to download your preferred edition:
Zorin OS Core (Free)
- Full-featured desktop experience
- Windows-like interface by default
- Includes essential applications
- Best for: Modern computers with 4+ GB RAM
- File size: Approximately 2.8-3.2 GB
Zorin OS Lite (Free)
- Lightweight desktop optimized for performance
- Runs smoothly on older hardware
- Lower system resource requirements
- Best for: Computers with 1-2 GB RAM or older processors
- File size: Approximately 2.2-2.6 GB
Zorin OS Pro (Paid - €39)
- Premium edition with additional features
- Multiple desktop layout options (Windows 11, macOS, Ubuntu-style)
- Includes advanced creativity and productivity applications
- Priority support from Zorin development team
- Best for: Power users and professionals who want maximum customization
For most beginners, Zorin OS Core provides an excellent balance of features and performance. If you're working with a computer older than 8 years, Zorin OS Lite is the recommended choice.
How to Verify Download Integrity
After downloading, verify that your ISO file wasn't corrupted during download:
For Windows users:
- Open Command Prompt
- Navigate to your Downloads folder
- Type:
certutil -hashfile Zorin-OS-17-Core-64-bit.iso SHA256 - Compare the output with the SHA256 checksum listed on the Zorin website
For macOS users:
- Open Terminal
- Navigate to your Downloads folder
- Type:
shasum -a 256 Zorin-OS-17-Core-64-bit.iso - Compare the output with the official checksum
If the checksums match, your download is complete and uncorrupted.
File Size Expectations
- Download time on 10 Mbps connection: 30-45 minutes
- Download time on 50 Mbps connection: 6-10 minutes
- Download time on 100 Mbps connection: 3-5 minutes
Ensure you have stable internet during the download process. If interrupted, most browsers can resume the download.
Creating a Bootable USB Drive
To install Zorin OS, you'll need to create a bootable USB drive containing the installation files.
What You'll Need
- A USB flash drive with at least 4 GB capacity (8 GB recommended)
- The Zorin OS ISO file you downloaded
- USB creation software (Rufus for Windows, balenaEtcher for all platforms)
IMPORTANT: Creating a bootable USB will erase all existing data on the drive. Back up any important files from your USB drive before proceeding.
Creating Bootable USB Using Rufus (Windows Users)
Rufus is a fast, reliable tool for Windows users:
- Download Rufus from rufus.ie (portable version requires no installation)
- Insert your USB drive into an available USB port
- Launch Rufus (may require administrator permission)
- Configure settings:
- Device: Select your USB drive from the dropdown menu
- Boot selection: Click "SELECT" and choose your Zorin OS ISO file
- Partition scheme: Choose "GPT" for UEFI computers or "MBR" for older BIOS systems
- File system: Leave as "FAT32" (default)
- Cluster size: Leave as default
- Click "START" to begin the process
- Wait for completion (typically 5-10 minutes)
- Safely eject your USB drive when finished
Creating Bootable USB Using balenaEtcher (Cross-Platform)
BalenaEtcher works on Windows, macOS, and Linux:
- Download balenaEtcher from balena.io/etcher
- Install and launch the application
- Click "Flash from file" and select your Zorin OS ISO
- Click "Select target" and choose your USB drive
- Click "Flash!" to begin the process
- Enter your system password if prompted (macOS/Linux)
- Wait for verification to complete
- Close the application when the "Flash Complete!" message appears
BalenaEtcher automatically verifies the written data, ensuring your bootable USB is correctly created.
Booting from USB
With your bootable USB ready, it's time to configure your computer to boot from it.
Accessing BIOS/UEFI Settings
The method to access BIOS/UEFI varies by manufacturer:
- Dell computers: Press F12 repeatedly during startup
- HP computers: Press F9 or Esc, then F9
- Lenovo computers: Press F12 or Fn+F12
- Acer computers: Press F12 (you may need to enable F12 Boot Menu in BIOS first)
- Asus computers: Press F8 or Esc
- MSI computers: Press F11
- Generic motherboards: Try F2, F10, Delete, or Esc
Timing is critical: Start pressing the key repeatedly immediately after powering on your computer, before any logo appears.
Changing Boot Order
Once in BIOS/UEFI settings:
Method 1: Boot Menu (Recommended for beginners)
- Select your USB drive from the one-time boot menu
- This doesn't permanently change settings
- Your computer will return to normal boot order after installation
Method 2: Boot Order Configuration
- Navigate to the "Boot" tab using arrow keys
- Find "Boot Priority" or "Boot Order" section
- Move "USB Drive" or "Removable Devices" to the top of the list
- Save changes and exit (usually F10)
Your computer should now restart and boot from the USB drive, loading the Zorin OS installer.
Troubleshooting Boot Issues
Problem: Computer doesn't recognize USB drive
- Try a different USB port (use USB 2.0 ports if available)
- Recreate the bootable USB with different software
- Ensure USB drive is properly inserted before powering on
Problem: "Secure Boot Violation" error
- Return to BIOS/UEFI settings
- Disable Secure Boot (usually in Security or Boot section)
- Save changes and restart
Problem: Black screen or "No bootable device" message
- Verify you created the bootable USB correctly
- Check that boot order prioritizes USB devices
- Try creating USB with different partition scheme (GPT vs MBR)
Installing Zorin OS
Congratulations! You've successfully booted into the Zorin OS live environment. Now let's walk through the installation process step by step.
Zorin OS Live Environment
When you first boot from USB, you'll see the Zorin OS desktop. This is a "live session" — a fully functional operating system running from your USB drive without installing anything on your computer. You can explore Zorin OS, test hardware compatibility, and ensure everything works before committing to installation.
To begin installation, double-click the "Install Zorin OS" icon on the desktop.
Step 1: Select Your Language
Choose your preferred language from the list. This will be used throughout the installation process and as your system's default language. Click "Continue" when ready.
Step 2: Choose Keyboard Layout
Select your keyboard layout and variant. The installer will display a text box where you can test your selection by typing special characters. Common options include:
- English (US)
- English (UK)
- Spanish
- French
- German
Click "Continue" after confirming your keyboard works correctly.
Step 3: Updates and Additional Software
You'll see two checkbox options:
"Download updates while installing Zorin OS" (Recommended)
- Ensures your system is current from the start
- Requires active internet connection
- Adds 10-20 minutes to installation time
"Install third-party software for graphics, Wi-Fi hardware, and additional media formats" (Recommended)
- Installs proprietary drivers for better hardware compatibility
- Includes codecs for playing MP3, DVD, and other media formats
- Ensures Wi-Fi, graphics cards, and printers work properly
Check both boxes if you have a stable internet connection, then click "Continue."
Step 4: Installation Type (CRITICAL DECISION)
This is the most important decision in the installation process. You'll see several options:
Option A: "Erase disk and install Zorin OS"
- Removes everything on your hard drive
- Gives Zorin OS exclusive use of your computer
- Simplest option with no dual-boot complexity
- WARNING: This permanently deletes all existing data, including Windows/macOS
Option B: "Install Zorin OS alongside [Windows/macOS]"
- Keeps your existing operating system
- Creates dual-boot configuration
- Installer automatically partitions your drive
- You'll choose which OS to use at each startup
Option C: "Something else" (Advanced users)
- Manual partitioning control
- For experienced users who want custom partition layouts
- Allows separate /home partition for data preservation
For beginners: If you want to keep your current operating system, choose Option B (Install alongside). If you're dedicating this computer to Zorin OS, choose Option A (Erase disk).
Understanding Partitioning (Simplified)
Think of your hard drive as a bookshelf. Partitioning divides the shelf into sections for different purposes:
- Root partition (/): The main system partition where Zorin OS lives (minimum 15 GB, recommend 30 GB)
- Swap partition: Virtual memory space used when RAM is full (typically equal to your RAM amount)
- Home partition (/home): Your personal files and settings (optional but useful for data preservation)
If you chose automatic installation (Options A or B), the installer handles all partitioning for you. You don't need to understand the technical details.
Step 5: Confirm Disk Changes
The installer will show a summary of changes it will make to your disk. Review carefully:
- Which partitions will be formatted
- How much space is allocated to Zorin OS
- Whether your existing OS will be preserved (dual-boot)
This is your last chance to cancel before making permanent changes. Click "Continue" to proceed or "Go Back" to modify your choices.
Step 6: Select Your Time Zone
Click on the map to select your geographical location, or type your city name in the search box. This sets your system clock and time zone. Click "Continue."
Step 7: Create Your User Account
Provide the following information:
Your name: Your full name (for display purposes) Computer's name: A name for your computer on networks (e.g., "john-laptop" or "school-lab-pc05") Username: Your login name (lowercase, no spaces) Password: Choose a strong password (mix of letters, numbers, symbols) Confirm password: Re-enter your password
Password Tips:
- Minimum 8 characters recommended
- Combine uppercase, lowercase, numbers, and symbols
- Avoid dictionary words or personal information
- Use a memorable passphrase (e.g., "Coffee!Morning2026")
Login Options:
- "Require my password to log in" (Recommended for security)
- "Log in automatically" (Convenient but less secure)
Step 8: Encryption Option (Optional)
You'll see an option: "Encrypt my home folder"
What this does: Encrypts your personal files and settings, protecting them if your computer is stolen or accessed by unauthorized users.
Considerations:
- Adds slight performance overhead
- Essential for laptops and devices used in public
- Cannot recover files if you forget your password
- Recommended for schools, businesses, and privacy-conscious users
Check this box if security is a priority, then click "Continue."
Step 9: Installation Progress
The installation process now begins. You'll see a progress bar and slideshow introducing Zorin OS features. This typically takes 15-30 minutes depending on:
- Your hard drive speed (SSD vs traditional hard drive)
- Whether you're downloading updates simultaneously
- System performance
During installation, the system will:
- Copy system files to your hard drive
- Install bootloader (GRUB)
- Configure hardware drivers
- Apply system updates (if selected)
- Set up your user account
Do not remove the USB drive or power off your computer during this process.
Step 10: Installation Complete
When installation finishes, you'll see a dialog box: "Installation Complete - Please restart to use your new system."
You have two options:
- Continue Testing: Stay in the live USB environment
- Restart Now: Reboot into your newly installed Zorin OS
Click "Restart Now." The system will prompt you to remove the USB drive when appropriate. Remove it, then press Enter.
First Boot and Initial Setup
Your computer will restart and, if everything went smoothly, boot into Zorin OS for the first time.
First Boot Experience
For Single-Boot Installations: Your computer will boot directly into Zorin OS, presenting the login screen.
For Dual-Boot Installations: You'll see the GRUB boot menu — a text-based menu listing your operating systems:
- Zorin OS (default)
- Windows or macOS (if you chose dual-boot)
- Advanced options
Use arrow keys to select an operating system, then press Enter. The default option auto-boots after 10 seconds.
Logging In
- Select your username from the login screen
- Enter your password (the one you created during installation)
- Click "Sign In" or press Enter
Welcome to Zorin OS! You'll see a welcome screen with a tour of key features.
Initial Welcome Tour
Zorin OS presents a helpful tour introducing:
- Desktop layout and navigation
- Activities overview (accessing applications and windows)
- Software installation using Zorin Software Center
- System settings and customization
Take a few minutes to complete this tour — it's designed specifically for beginners.
Connecting to Wi-Fi
If you're using a laptop or desktop with Wi-Fi:
- Click the system tray (top-right corner)
- Click the network icon
- Select your Wi-Fi network from the list
- Enter your password when prompted
- Click "Connect"
Your network settings will be remembered for future sessions.
Updating Your System
After connecting to the internet, your first task should be updating your system to ensure you have the latest security patches and features.
Method 1: Using Software Updater (Recommended for beginners)
- Click "Activities" (top-left corner)
- Type "Software Updater" and press Enter
- The system will check for available updates
- Click "Install Now" when updates are found
- Enter your password when prompted
- Wait for updates to download and install
- Restart if prompted
Method 2: Using Terminal (Advanced users)
- Open Terminal (Ctrl+Alt+T)
- Type:
sudo apt update(checks for updates) - Enter your password
- Type:
sudo apt upgrade(installs updates) - Type "Y" to confirm
- Wait for completion
- Restart if necessary
How often should you update?
- Security updates: Weekly or when notified
- System upgrades: When new Zorin OS versions release (every 1-2 years)
- Application updates: As needed for new features
Installing Additional Drivers
Zorin OS usually detects and installs necessary drivers automatically. However, some hardware (graphics cards, Wi-Fi adapters, printers) may require proprietary drivers for optimal performance.
To check for additional drivers:
- Click "Activities"
- Type "Additional Drivers" or "Drivers Manager"
- Open the "Additional Drivers" application
- The system will scan for available driver options
- Select recommended drivers (typically marked with a star)
- Click "Apply Changes"
- Restart your computer when prompted
Common drivers that may need manual installation:
- NVIDIA graphics cards (for gaming and professional graphics work)
- Broadcom Wi-Fi adapters (common in older laptops)
- Canon/Epson printer drivers
- Wacom drawing tablets
Installing Essential Software
One of Zorin OS's greatest strengths is access to thousands of free, open-source applications. Let's install some essential software to make your system fully functional.
Zorin Software Center Overview
The Software Center is your one-stop shop for installing applications. It features:
- Curated collections of popular applications
- User ratings and reviews
- Screenshots and descriptions
- One-click installation
- Automatic updates for installed software
To open Software Center:
- Click "Activities"
- Click the "Software" icon (shopping bag symbol)
- Browse categories or use the search function
Office Suite Options
LibreOffice (Pre-installed)
- Full-featured office suite compatible with Microsoft Office formats
- Includes Writer (word processor), Calc (spreadsheets), Impress (presentations)
- Free alternative to Microsoft Office
- Best for: Document creation, spreadsheets, presentations
OnlyOffice (Alternative)
- Modern interface resembling Microsoft Office 365
- Excellent Microsoft Office compatibility
- Includes desktop editors and collaboration features
- Best for: Users transitioning from Microsoft Office
To install OnlyOffice:
- Open Software Center
- Search "OnlyOffice"
- Click "Install"
- Enter your password when prompted
Web Browsers
Firefox (Pre-installed)
- Privacy-focused browser
- Excellent security features
- Extensive add-on library
Google Chrome (Popular alternative)
- Download from google.com/chrome
- Open the downloaded .deb file
- Click "Install" in Software Center
Brave (Privacy-focused alternative)
- Open Software Center
- Search "Brave"
- Click "Install"
Media Players
VLC Media Player (Highly Recommended)
- Plays virtually all video and audio formats
- No codec hunting required
- Supports streaming and DVD playback
To install VLC:
- Open Software Center
- Search "VLC"
- Click "Install"
Rhythmbox (Music player - pre-installed)
- Organizes your music library
- Supports podcasts and internet radio
- Similar to iTunes
Communication Applications
Thunderbird Email Client
- Full-featured email application
- Supports Gmail, Outlook, and other email services
- Calendar and contact management
Zoom, Microsoft Teams, Slack
- All available in Software Center
- Essential for remote work and online learning
- Search by name and install as needed
Graphics and Creativity
GIMP (Image editing)
- Professional photo editing software
- Free alternative to Adobe Photoshop
- Powerful tools for graphic design
Inkscape (Vector graphics)
- Professional vector graphics editor
- Free alternative to Adobe Illustrator
- Perfect for logos, illustrations, and technical diagrams
Productivity Tools
Timeshift (System backup - CRITICAL)
- Creates system snapshots for easy recovery
- Essential safety net for system changes
- Restores your system to previous states
To install Timeshift:
- Open Software Center
- Search "Timeshift"
- Click "Install"
- Configure first backup immediately
Post-Installation Optimization
Now let's optimize your Zorin OS installation for security, performance, and usability.
Enabling the Firewall
Zorin OS includes a firewall (UFW - Uncomplicated Firewall), but it's disabled by default.
To enable firewall:
- Open Terminal (Ctrl+Alt+T)
- Type:
sudo ufw enable - Enter your password
- Type:
sudo ufw statusto verify it's active
For most users, the default firewall rules provide adequate protection. Advanced users can configure specific port rules using GUFW (graphical firewall manager):
- Install GUFW:
sudo apt install gufw - Search "Firewall" in Activities
- Configure rules as needed
Customizing Desktop Layout
Zorin OS allows extensive customization to match your workflow preferences:
To access appearance settings:
- Click "Activities"
- Type "Appearance" and press Enter
- Explore customization options:
- Themes: Light, dark, or automatic switching
- Accent colors: Customize interface colors
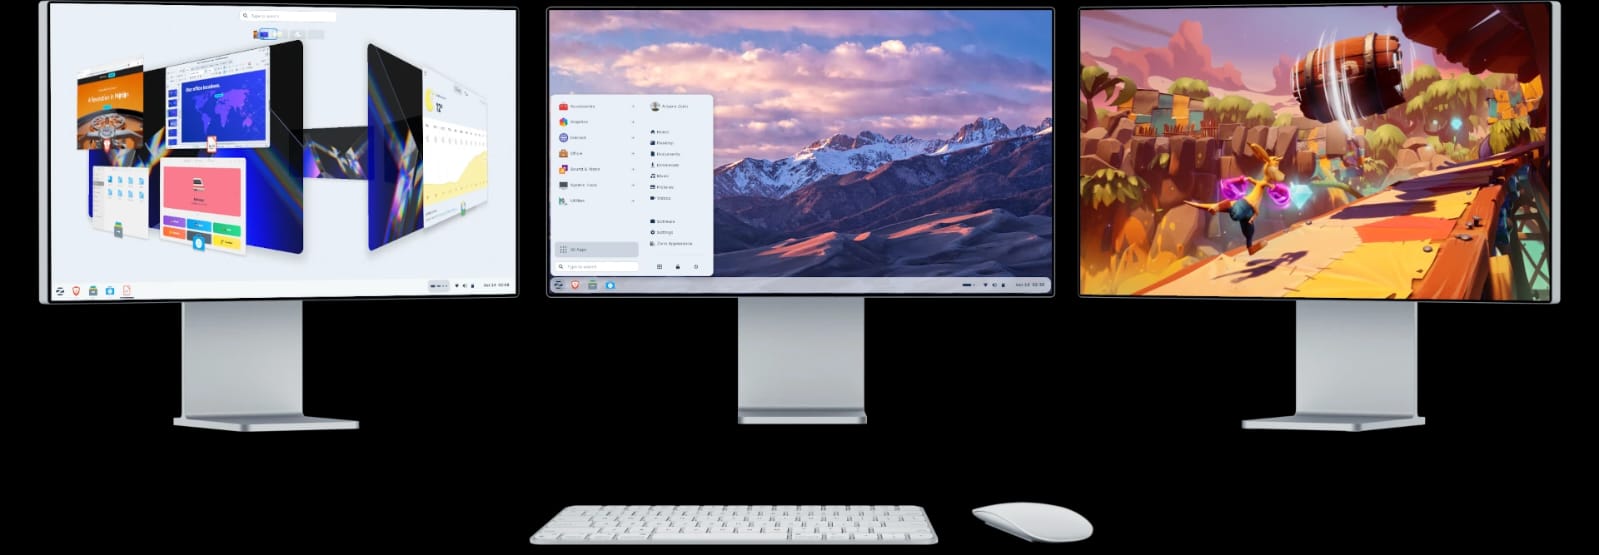
- Desktop layout: Windows-like, macOS-like, or GNOME-like (Pro version)
- Wallpapers: Built-in collection or custom images
Taskbar customization:
- Right-click the taskbar
- Select "Panel Settings"
- Adjust position, size, and behavior
- Add or remove applets (system monitors, weather, etc.)
Installing Multimedia Codecs
While basic codecs were installed during setup (if you checked the third-party software option), some proprietary formats require additional packages:
To install restricted extras:
- Open Terminal
- Type:
sudo apt install ubuntu-restricted-extras - Enter your password
- Accept license agreements when prompted (use Tab and Enter keys)
This package includes:
- MP3 and AAC audio codecs
- Microsoft TrueType fonts
- Adobe Flash plugin (for legacy content)
- DVD playback support
Setting Up Printers
Zorin OS has excellent printer support, often detecting and configuring printers automatically:
For USB printers:
- Connect printer via USB cable
- Power on the printer
- Zorin OS typically auto-detects and installs drivers
- Open "Activities" > "Printers" to verify
For network printers:
- Click "Activities"
- Type "Printers" and press Enter
- Click "Add Printer"
- Select your printer from the network list
- Follow on-screen instructions
For HP printers (recommended): Install HPLIP (HP Linux Imaging and Printing):
- Open Terminal
- Type:
sudo apt install hplip-gui - Run HP setup:
hp-setup - Follow the wizard
Performance Optimization Tips
For systems with limited RAM (2-4 GB):
- Use Zorin OS Lite instead of Core
- Disable visual effects: Settings > Appearance > Animations (toggle off)
- Limit startup applications: Settings > Startup Applications
- Close unused applications promptly
For systems with SSDs:
- TRIM is usually enabled automatically
- Verify with:
sudo systemctl status fstrim.timer
For all systems:
- Regularly clean package cache:
sudo apt autoremoveandsudo apt clean - Monitor system resources: Install "GNOME System Monitor" from Software Center
- Keep system updated for performance improvements
Troubleshooting Common Issues
Even with careful installation, you may encounter challenges. Here are solutions to the most common problems.
Problem: Black Screen After Boot
Possible causes: Graphics driver conflicts, especially with NVIDIA cards
Solution 1: Boot with nomodeset parameter
- At GRUB boot menu, press 'e' to edit boot parameters
- Find the line starting with "linux"
- Add
nomodesetbefore "quiet splash" - Press Ctrl+X or F10 to boot
- Once booted, install proper graphics drivers via Additional Drivers
Solution 2: Try alternate graphics mode
- At GRUB menu, select "Advanced options for Zorin OS"
- Choose recovery mode
- Select "Resume normal boot"
Problem: Wi-Fi Not Working
Possible causes: Missing firmware for Wi-Fi adapter
Solution 1: Check if Wi-Fi is hardware-disabled
- Look for physical Wi-Fi switch on laptop
- Try Fn+F2 (or similar) to toggle Wi-Fi
Solution 2: Install firmware
- Connect via Ethernet cable temporarily
- Open Terminal
- Type:
sudo apt update - Type:
sudo apt install linux-firmware - Restart computer
Solution 3: Check Additional Drivers
- Open "Additional Drivers" application
- Look for Broadcom or other Wi-Fi drivers
- Select and install recommended driver
- Restart
Problem: Dual Boot Not Showing Windows/macOS
Possible causes: GRUB didn't detect other operating system
Solution: Update GRUB
- Boot into Zorin OS
- Open Terminal
- Type:
sudo update-grub - Enter password
- GRUB will search for other operating systems
- Restart to verify boot menu includes all options
Problem: Slow Performance
Diagnostics:
- Open System Monitor (search in Activities)
- Check CPU, memory, and disk usage
- Identify resource-heavy processes
Solutions:
- Close unnecessary applications
- Disable startup applications you don't need
- Consider upgrading RAM if consistently maxed out
- Switch to Zorin OS Lite for better performance on older hardware
Problem: Sound Not Working
Solution 1: Check volume and output device
- Click sound icon in system tray
- Ensure volume isn't muted
- Click "Sound Settings"
- Verify correct output device is selected (speakers vs. headphones)
Solution 2: Reload ALSA (sound system)
- Open Terminal
- Type:
pulseaudio --kill - Wait 5 seconds
- Type:
pulseaudio --start
Bootloader Repair (Advanced)
If your GRUB bootloader becomes corrupted:
- Boot from Zorin OS USB (live session)
- Open Terminal
- Identify your system partition:
sudo fdisk -l - Mount your system partition:
sudo mount /dev/sdXY /mnt(replace XY with your partition) - Reinstall GRUB:
sudo grub-install --root-directory=/mnt /dev/sdX - Update GRUB:
sudo update-grub - Restart and remove USB
For complex bootloader issues, consider Boot Repair tool:
- Boot from USB
- Open Terminal
- Add repository:
sudo add-apt-repository ppa:yannubuntu/boot-repair - Update:
sudo apt update - Install:
sudo apt install boot-repair - Run:
boot-repair - Follow recommended repair
Zorin OS for Schools and Businesses
Zorin OS offers significant advantages for educational institutions and organizations looking to reduce costs while maintaining security and productivity.
Cost Savings
Licensing costs:
- Windows 10/11 Pro: $199 per device
- Microsoft Office 365: $70/year per user
- Zorin OS Core: Free
- Zorin OS Pro: €39 one-time payment
- LibreOffice: Free
For a school with 100 computers:
- Traditional setup: $19,900+ licensing + $7,000/year subscriptions
- Zorin OS setup: $0-€3,900 (one-time for Pro licenses)
- Potential savings: $23,000+ in first year alone
Extended Hardware Lifecycle
Zorin OS breathes new life into aging computers:
- Computers too slow for Windows 11 run smoothly on Zorin OS
- Reduces e-waste and environmental impact
- Delays expensive hardware refresh cycles by 3-5 years
- 8-10 year old computers become productive workstations
Security Benefits
Built-in advantages:
- Linux architecture inherently resistant to Windows malware
- No expensive antivirus subscriptions required
- Regular security updates included free
- Minimal attack surface compared to Windows
- User permission structure prevents unauthorized system changes
Compliance benefits:
- Better data privacy controls
- GDPR compliance easier to maintain
- Reduced risk of ransomware attacks
- Transparent, auditable open-source code
Centralized Management
IT administrators can deploy and manage Zorin OS at scale:
- Network-based installation (PXE boot)
- Automated configuration using scripts
- Centralized updates via local repositories
- Shared network drives and printers
- LDAP/Active Directory integration possible
Educational Software Compatibility
Most educational platforms work perfectly on Zorin OS:
- Google Classroom (web-based)
- Microsoft Teams (Linux application available)
- Zoom (native Linux support)
- Educational games and software available via Software Center
- LibreOffice compatible with school assignment formats
Training and Support
Minimal training required:
- Familiar Windows-like interface reduces learning curve
- Most users adapt within 1-2 days
- Extensive online documentation and community support
- Zorin OS Pro includes professional support
Recommended deployment strategy:
- Start with pilot program (one classroom or department)
- Train key staff members as champions
- Gather feedback and address concerns
- Gradually expand deployment